Customer Resources

Owners Manual

Everything you need to get the most out of your installation, and peace of mind moving forward.
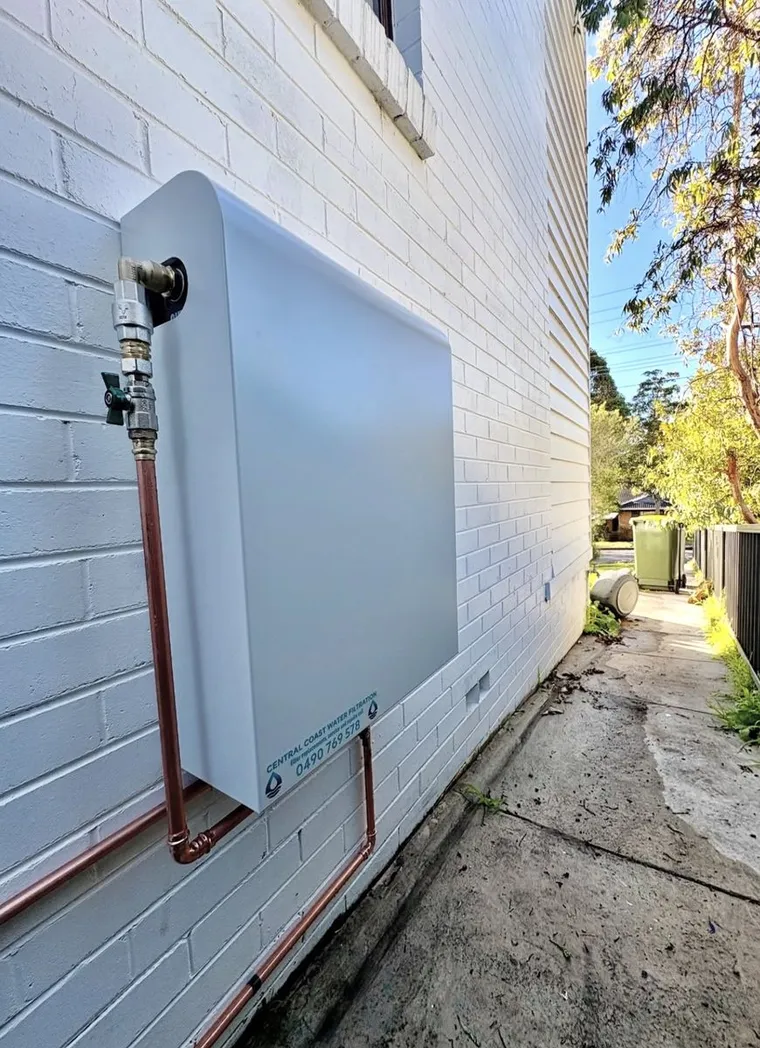
Slimline whole house water filtration system installed on a brick wall with copper plumbing

Thank You for Supporting Local

Thank you for choosing us and supporting a locally owned business. We genuinely appreciate the trust you’ve placed in us and the opportunity to look after your home. Every job we do is completed with care, pride, and attention to detail, just as we would expect in our own homes.

This owner’s manual has been created to help you get the most out of your installation and to give you peace of mind moving forward. If you ever have questions or need support, we’re only a call or message away.

Thanks again for your support — it truly means a lot to us.
Whole House Water Filtration System

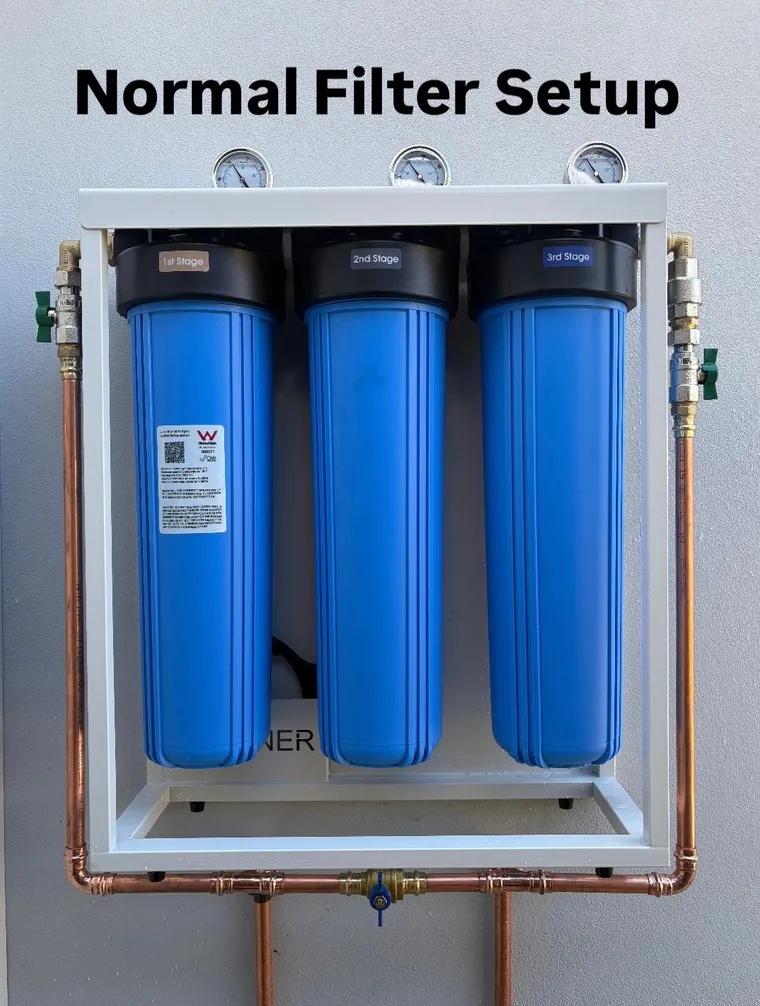
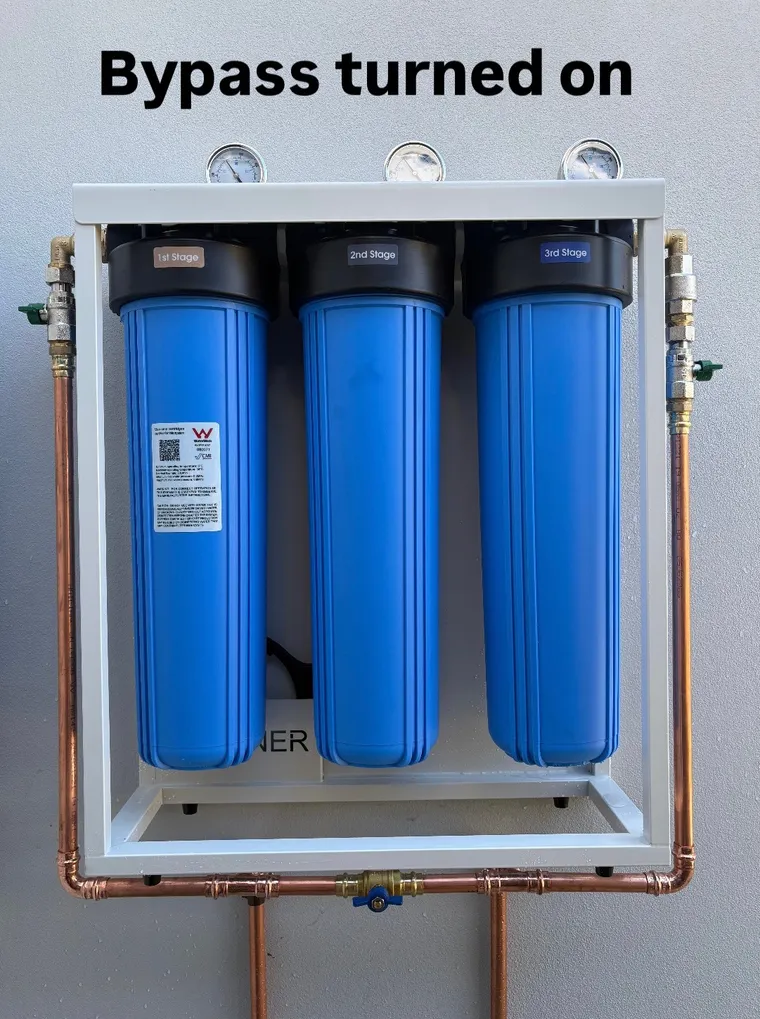
Your system is now fully installed, meaning every tap and appliance is protected. It includes a manual bypass, allowing you to switch back to standard mains water at any time.

To activate the bypass:

To return to filtered water:

We’ll remind you in 12 months when your cartridges are due for replacement. If you notice reduced pressure or changes in taste or smell, you may need to replace them sooner.

Whole house filtration system with the bypass turned on: inlet and outlet valve handles at a right angle to the pipes and the bypass valve underneath turned on Whole house filtration system in the normal filtered setup: inlet and outlet valve handles in line with the pipes and the bypass valve underneath turned off

Whole House System — Yearly Filter Change Guide

Watch the video guide

1. Remove the cover

  1. Remove the screws on each side and on the top or front (depending on your model).
  2. Carefully remove the cover and set it aside.

2. Isolate & depressurise the system

  1. Turn off the inlet and outlet valves on either side of the system.
  2. Press and hold the red pressure-release buttons on top of the system until the gauges drop to 0.
    • ⚠️ This step is critical — housings will be extremely difficult to remove if pressure is not released.

3. Remove filter housings

  1. Using the supplied spanner, crack the seal on each housing (loosen slightly).
  2. Unscrew the housings fully by hand, one at a time.
  3. Remove the old filter cartridges and set them aside for disposal.

4. Clean the housings (if needed)

  1. Wipe the inside of each housing with a clean cloth.
  2. If washing with water:
    • Turn the bypass valve on
    • Rinse housings using a nearby tap
    • Remember to turn the bypass valve back off once finished

5. Install new filters

  1. Install the new cartridges labelled 1, 2, and 3.
    • ⚠️ Filter order may not always be left-to-right depending on your system.
  2. If unsure which housing is first:
    • Briefly turn one valve on — one will do nothing, the other will allow water to flow.
    • The housing that fills first is Filter #1 (inlet).

6. Reinstall housings

  1. Check the rubber O-ring is seated correctly at the top of each housing.
  2. Screw housings back on by hand first, then lightly tighten with the spanner.
    • Do not overtighten.

7. Restart & flush the system

  1. Slowly turn both inlet and outlet valves back on.
  2. If possible, turn on a nearby outdoor tap to flush the system.
  3. Fully open both valves while checking carefully for leaks.
  4. Flush water through the system for 5–10 minutes, or until any milky or cloudy water clears.

8. Refit cover

  1. Reinstall the cover.
  2. Secure with the screws removed earlier.

Under Sink Reverse Osmosis System

The RO tank takes 30–45 minutes to fill from empty.

Flushing the system (first use or after filter changes):

  1. Let the tank fill.
  2. Run the tap for 3–4 minutes or until the stream weakens.
  3. Turn off the tap and allow the tank to refill.

You may notice slightly milky water for the first day or two — this is normal and caused by trapped air. A mild sweet taste for the first 1–2 weeks is also normal due to the remineraliser.

The 12-litre tank holds about 8–10 litres of usable water because of the internal bladder. Heavy use may reduce flow temporarily as it refills.

To turn the system off:

Both valves turn only a quarter-turn. To confirm it’s off, open the tap — only a small dribble should come out.

RO System — Yearly Filter Change Guide

Watch the video guide

1. Isolate the system & release pressure

  1. Turn off the black isolation tap under the sink.
  2. Turn off the blue isolation tap on top of the storage tank.
  3. Turn the filtered water tap on to release pressure.

2. Replace the filters

  1. Remove the sediment filter
    • Note: the thread is reversed — turn right to loosen.
  2. Remove the yellow cap from the new sediment filter and install it.
  3. Remove and discard the first carbon filter (next to the sediment filter).
  4. Remove the last carbon filter (4th position) and reinstall it into the 2nd position
    • This filter has had minimal use as a polishing filter.
  5. Install the new carbon filter into the 4th position.

⚠️ Do not overtighten filters — each filter has a rubber seal to prevent leaks.

3. Replace the alkaliser

  1. Remove the alkaliser from the bracket and note the inlet and outlet direction.
  2. Using a flat-head screwdriver or butter knife, press down the white oval tab and pull out the blue tube. Repeat on the other side.
  3. Remove the white caps from the new alkaliser.
  4. Push the blue tubes firmly into each end of the alkaliser, ensuring correct direction.
    • Tip: follow the blue pipe to the bottom of the tap — this is the outlet.

4. Restart the system

  1. Double-check all filters and connections.
  2. Turn the black isolation tap back on.
  3. Make sure the filtered water tap is on — air and spluttering is normal.
  4. Wait until water flows as a steady dribble (usually a few minutes).
  5. Turn the filtered tap off and allow the system to pressurise.
  6. Check carefully for any leaks (filters and alkaliser connections).

5. Flush & refill

  1. Turn the blue valve on top of the tank back on.
  2. Run the filtered tap for 2–4 minutes, until flow weakens.
  3. Let the system refill for 30–60 minutes.
  4. Check again for leaks.
  5. Run the tap again for 2–4 minutes until flow weakens.
  6. Let the system refill — it’s now ready to use.

6. What to expect after a filter change

If you have any further queries, head over to our Frequently Asked Questions!

Follow us on Facebook and Instagram to keep up to date!